

How to photograph a property with your iPhone
A practical guide to getting professional-looking property photos using just your iPhone and the Archir app.
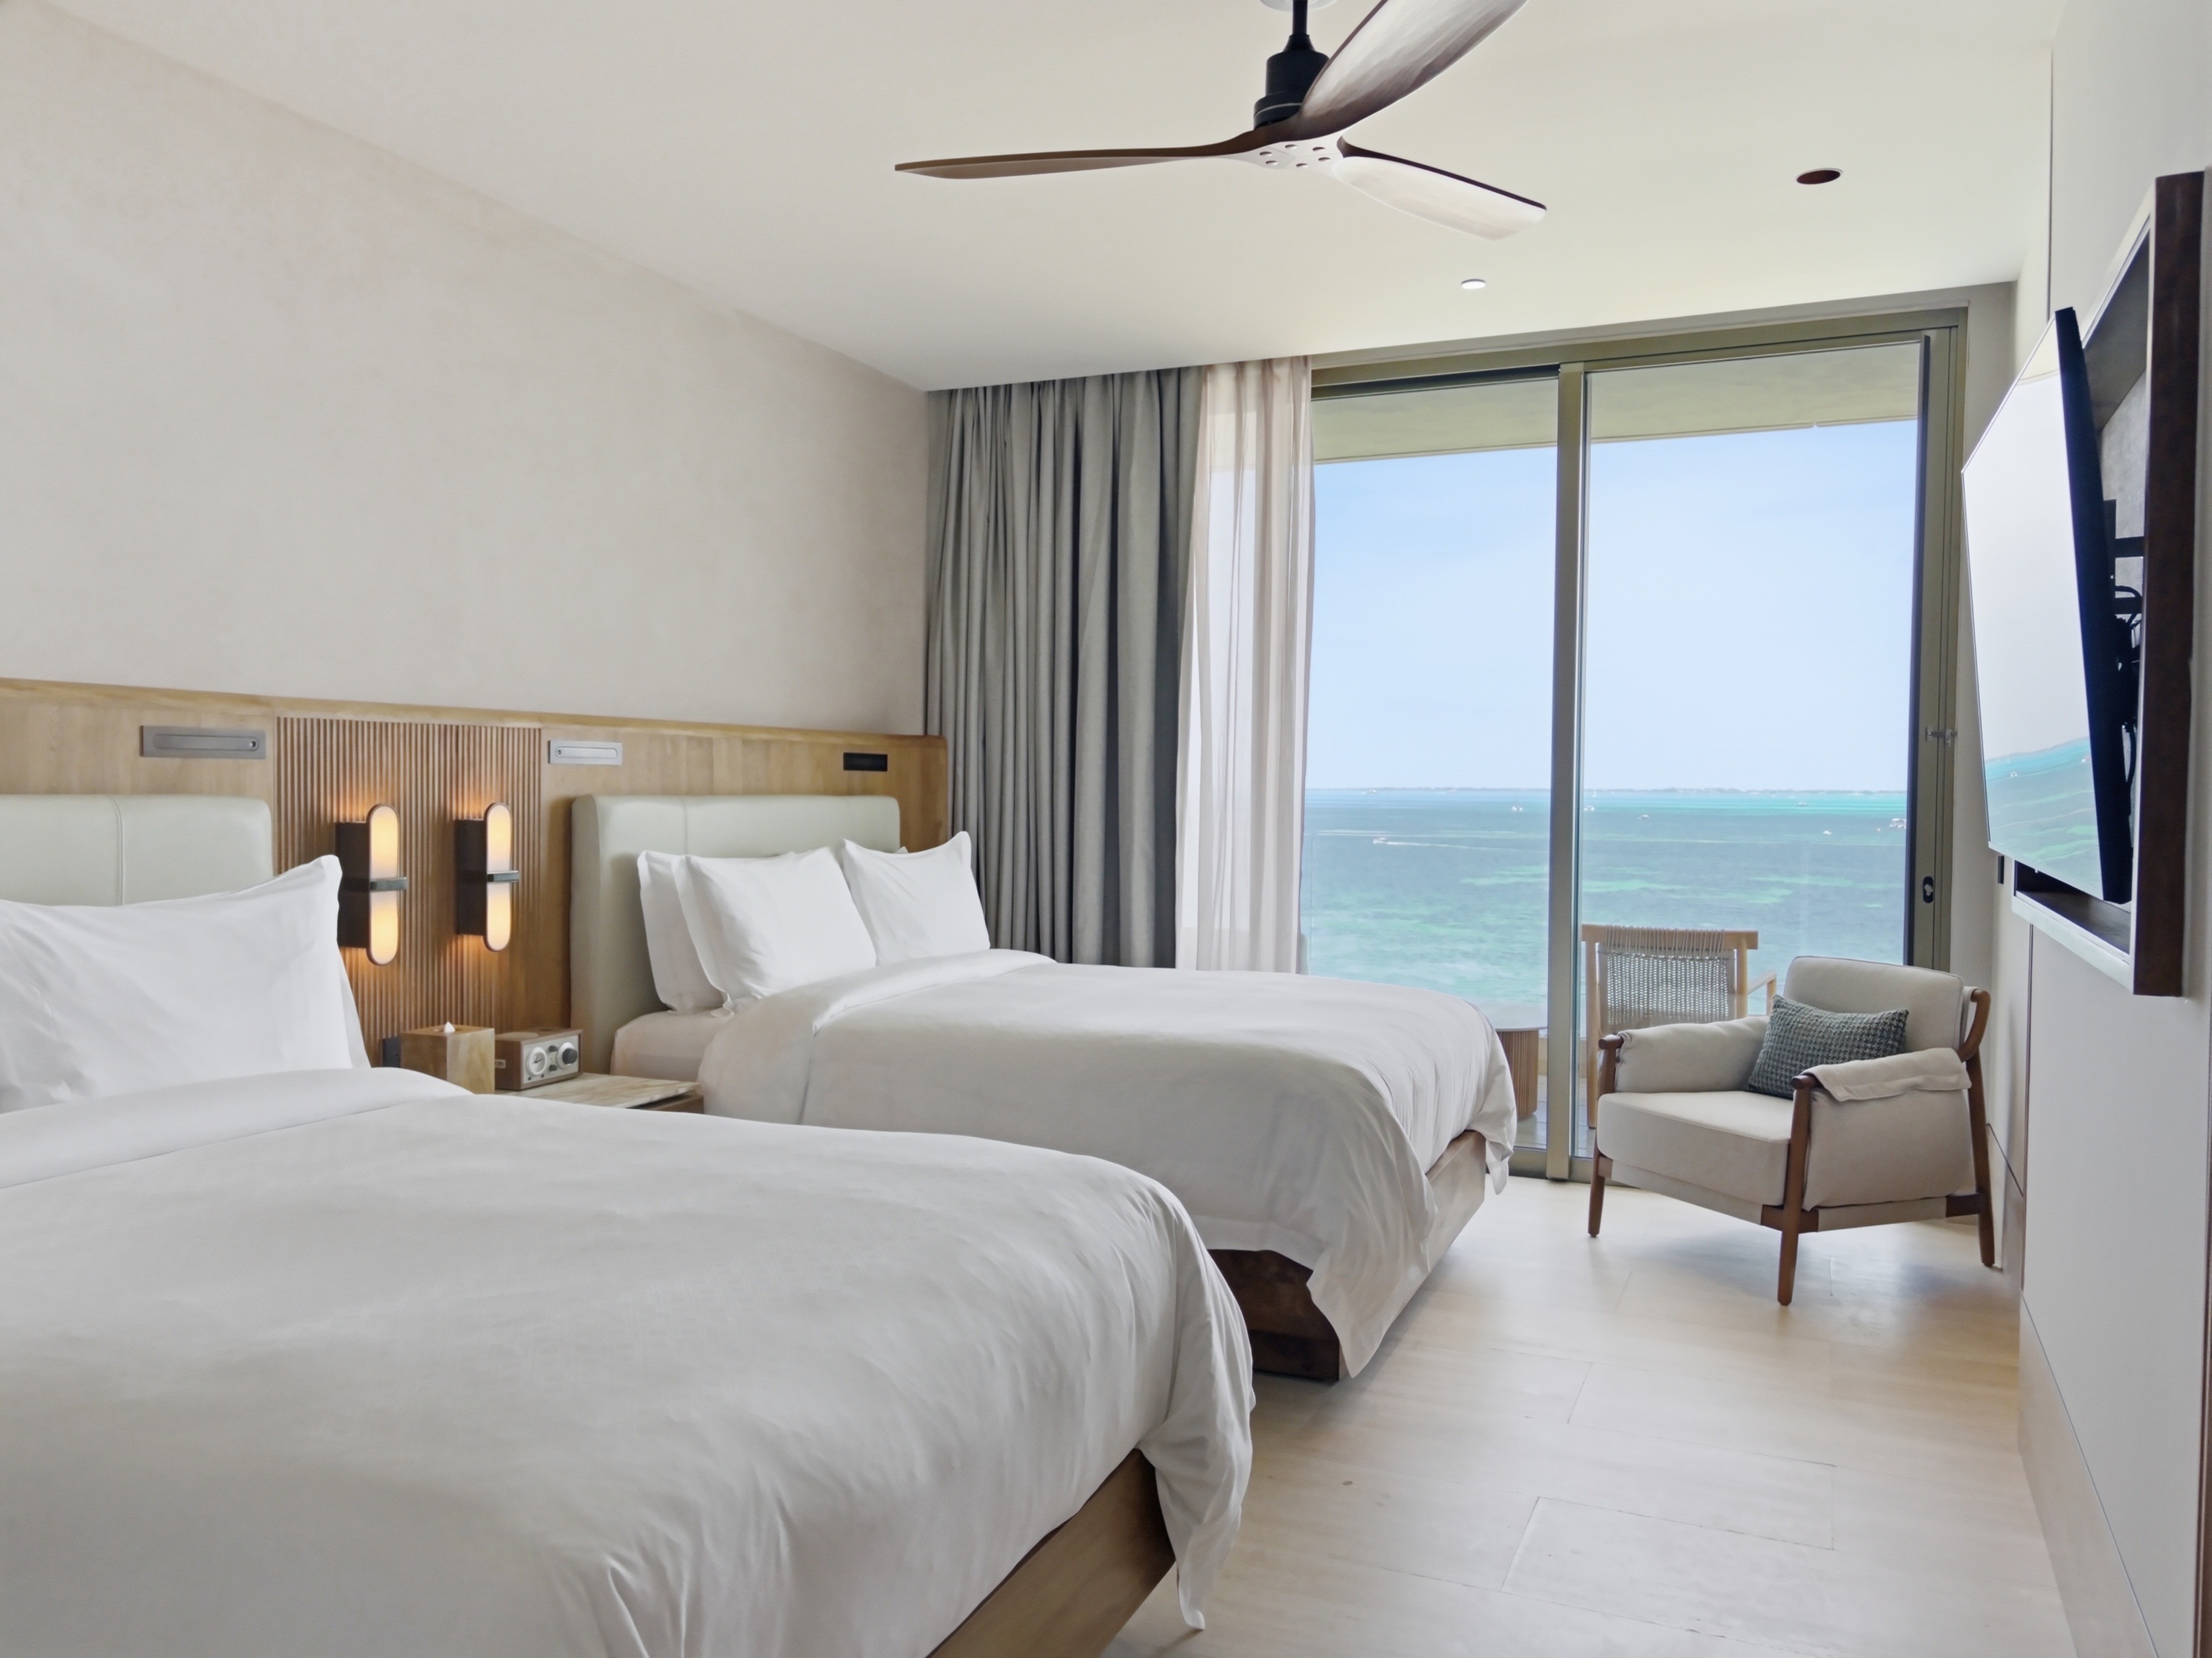
The difference between a property photo that looks amateur and one that looks professional isn't about which phone you have. It comes down to a few small things you do before you even press the shutter — things almost nobody writes about, because only people who photograph properties every day deal with them.
In this article, we'll look at preparing the space, the time of day, the height you shoot from, and one thing absolutely everyone underestimates — a clean lens.
Staging: how much preparation actually makes sense
Staging doesn't mean the same thing for an empty apartment, a furnished apartment, and a luxury villa — and it's worth knowing which category your property falls into before you start.
But before we get into extra styling, one thing needs to be said plainly: cleaning must never be underestimated, no matter what you're photographing. We've personally shown up to a real estate shoot where there were still food scraps in the kitchen and trash that hadn't been taken out since the day before. These are exactly the details that shape the overall impression — make sure the space is genuinely thoroughly cleaned, ideally with the windows washed too, and the fewer small items left in the frame, the better the photo ends up looking.
If the property is empty, you don't need to worry about extra staging — just focus on thorough cleanliness and light. If it's being sold or rented furnished, staging mainly means adjusting and unifying what's already there: straightening and cleaning the furniture, coordinating textiles, ironing bedding and towels if they're very wrinkled, and removing anything you feel doesn't belong in the shot.
For higher-end properties — villas, premium apartments, homes where the main thing being sold is a feeling — it's worth going a step further. Hiring an interior stylist or designer for a few hours to fine-tune the space specifically for the shoot isn't an unnecessary luxury. In practice, that means bringing in decorative cushions, setting out a bowl of fruit or simple refreshments, laying the dining table as if for dinner, and furnishing the terrace or garden with cushioned seating. The result is a photo that doesn't feel like a listing but like an invitation — and for premium properties, that's exactly what makes the difference.
In short: the more expensive the property, the more it makes sense to invest in extra styling. But regardless of budget, thorough cleaning down to the last detail is the foundation nothing else can replace.
Time of day and the exterior — the things people forget
A quick note on something easy to overlook: don't photograph a room while direct sunlight is streaming into it. It creates blown-out patches and harsh shadows that look distracting in the photo. If possible, wait until the sun changes position, or diffuse the light by drawing the curtains.
If you don't have a fixed time of day you have to shoot, and you have the option to photograph the space at different times of day, go ahead and take advantage of that — a few extra shots from a different time of day usually only benefit the listing.
And one last thing that's often forgotten: don't forget to photograph the exterior too — the garden, or any outdoor seating area or balcony. For a lot of properties, that's the first thing that decides whether a prospective buyer even looks any further.
The height you shoot from matters more than you think
This is a detail most people don't think about at all, yet it has a surprisingly big impact on the result: the height at which you hold your phone while shooting.
The recommended height is roughly chest level (about 120–130 cm / 47–51 in from the floor) — at Archir we use this as the default recommendation in the app. The reason is simple: a camera shoots with one lens, not two eyes. Our brain automatically reconstructs and adjusts the space from the natural eye-level view (higher up, roughly 150–170 cm / 59–67 in), but a lens can't do that — so a photo taken from eye level often looks distorted and less natural than how we remember the space. A photo taken from chest height gives the viewer a much more natural, balanced view of the room.
angle from eye level — confusing perspective
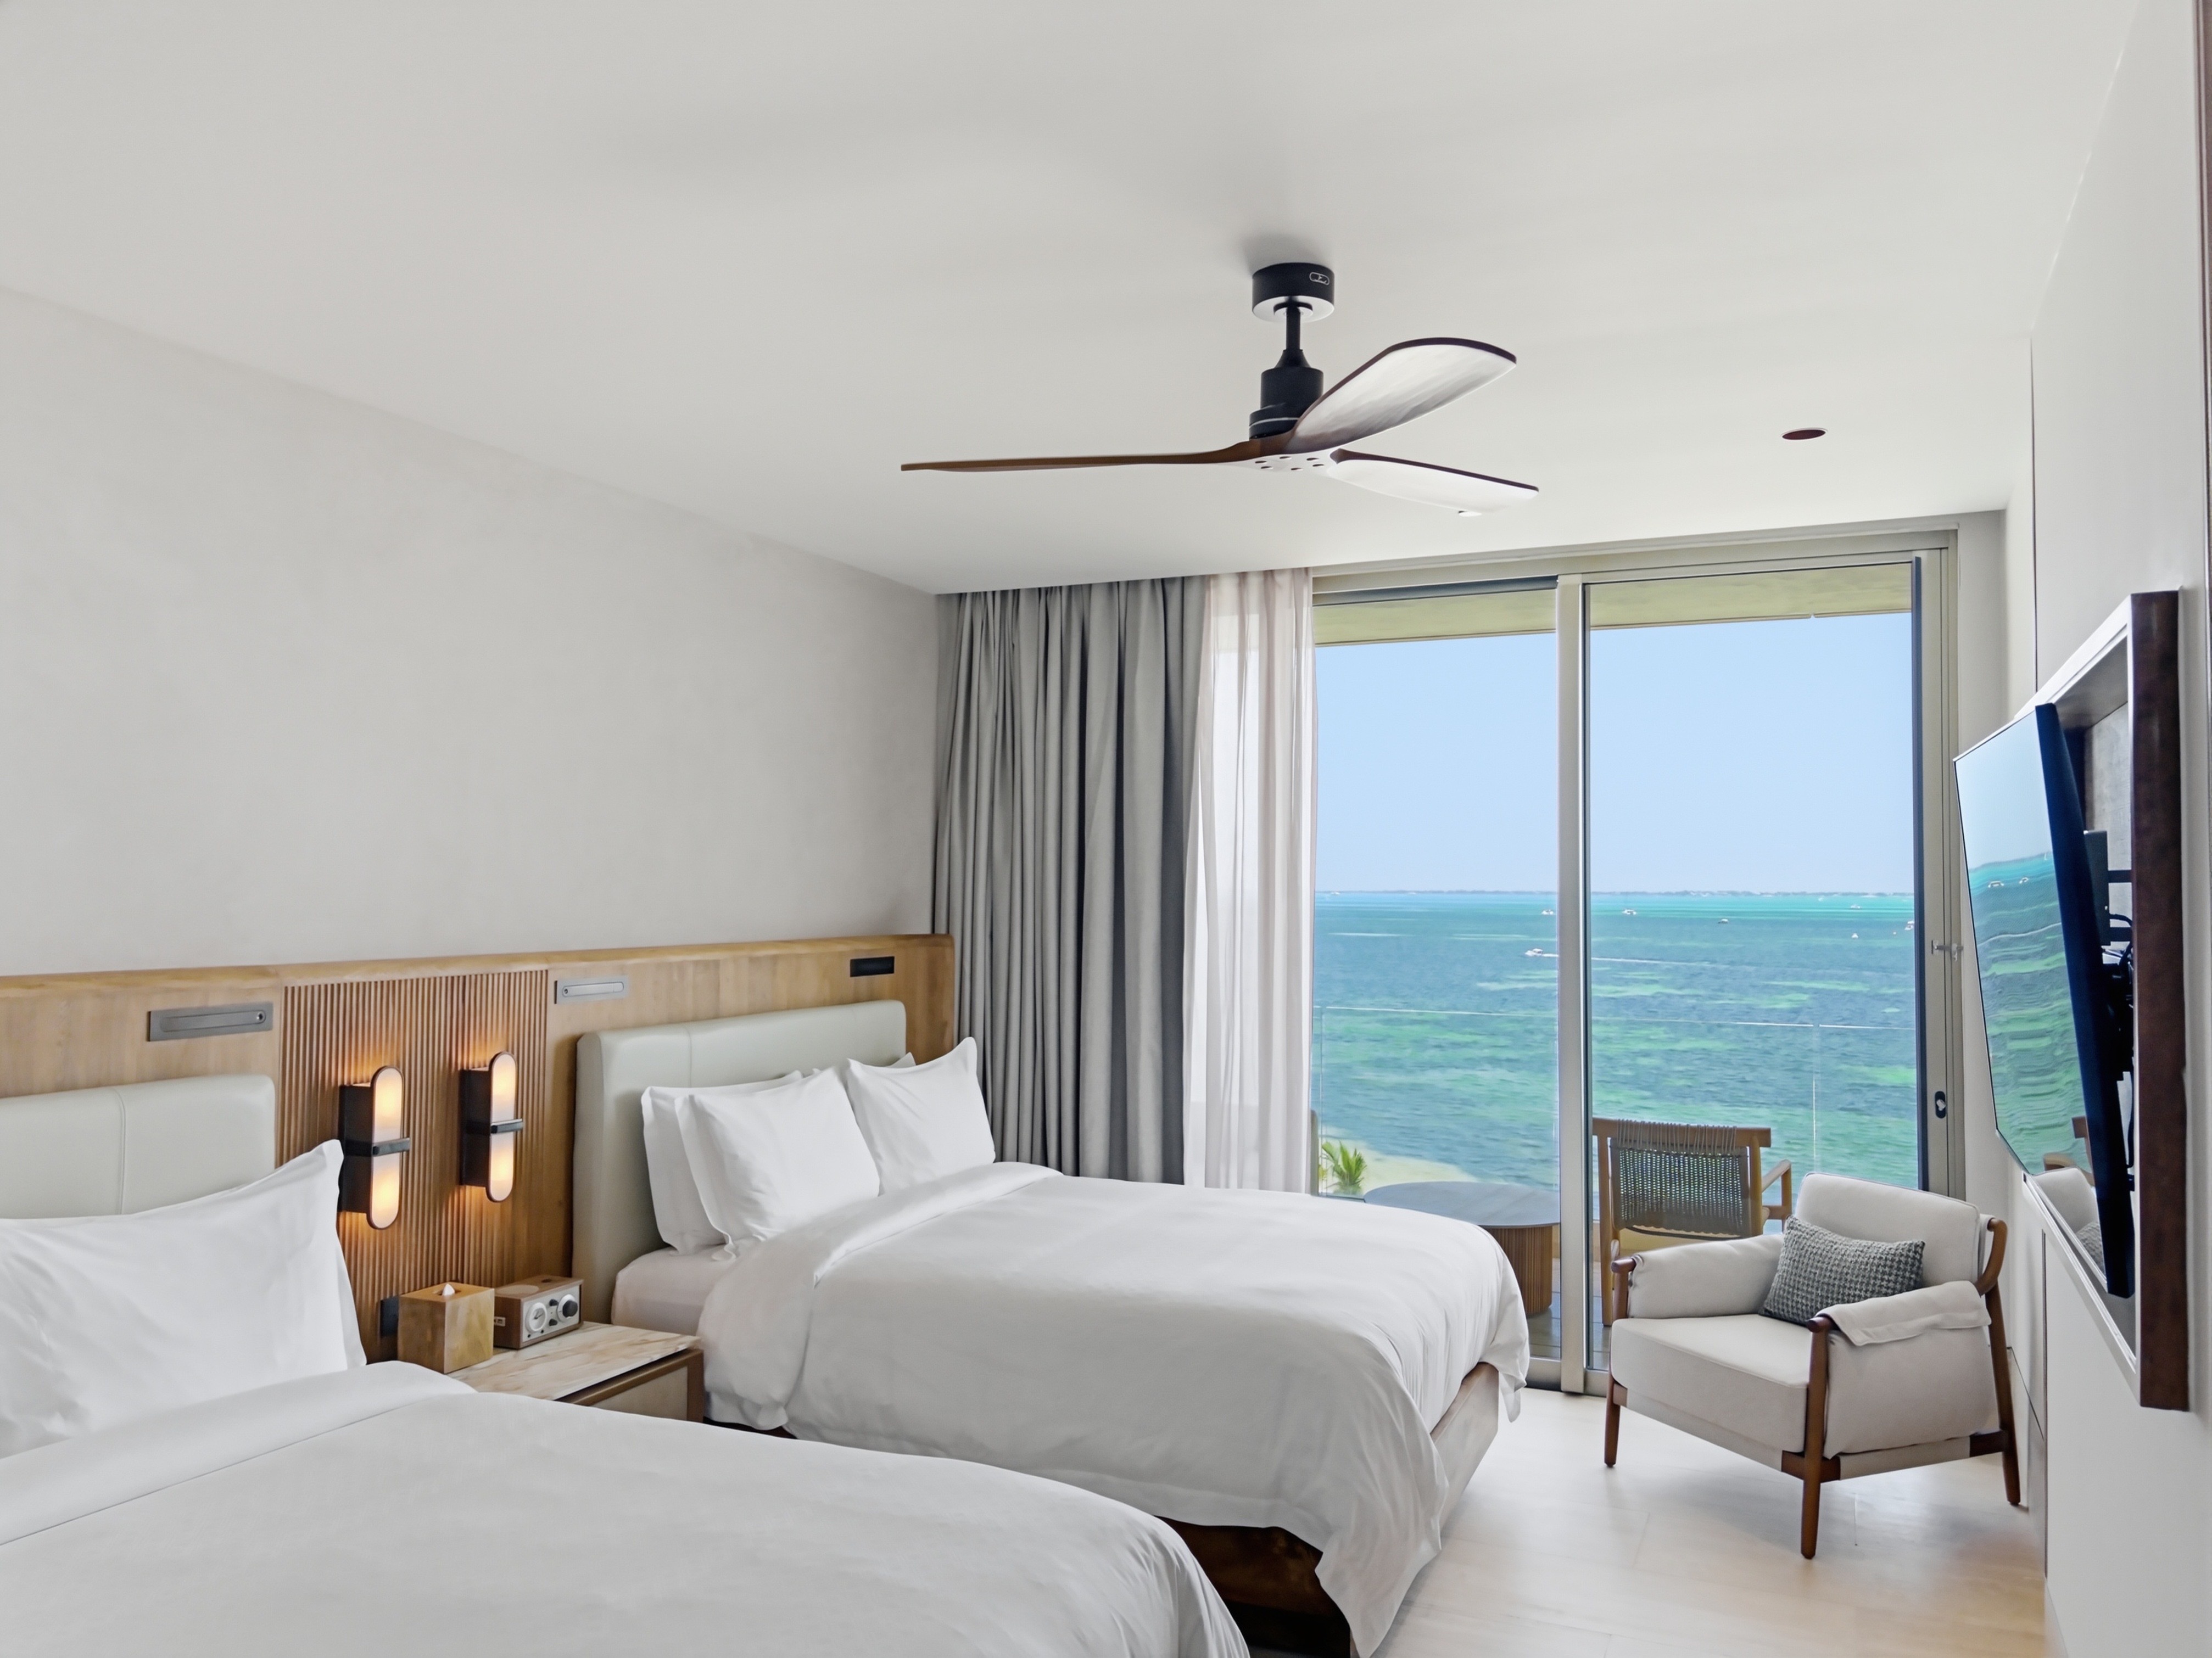
angle from chest height — recommended standard
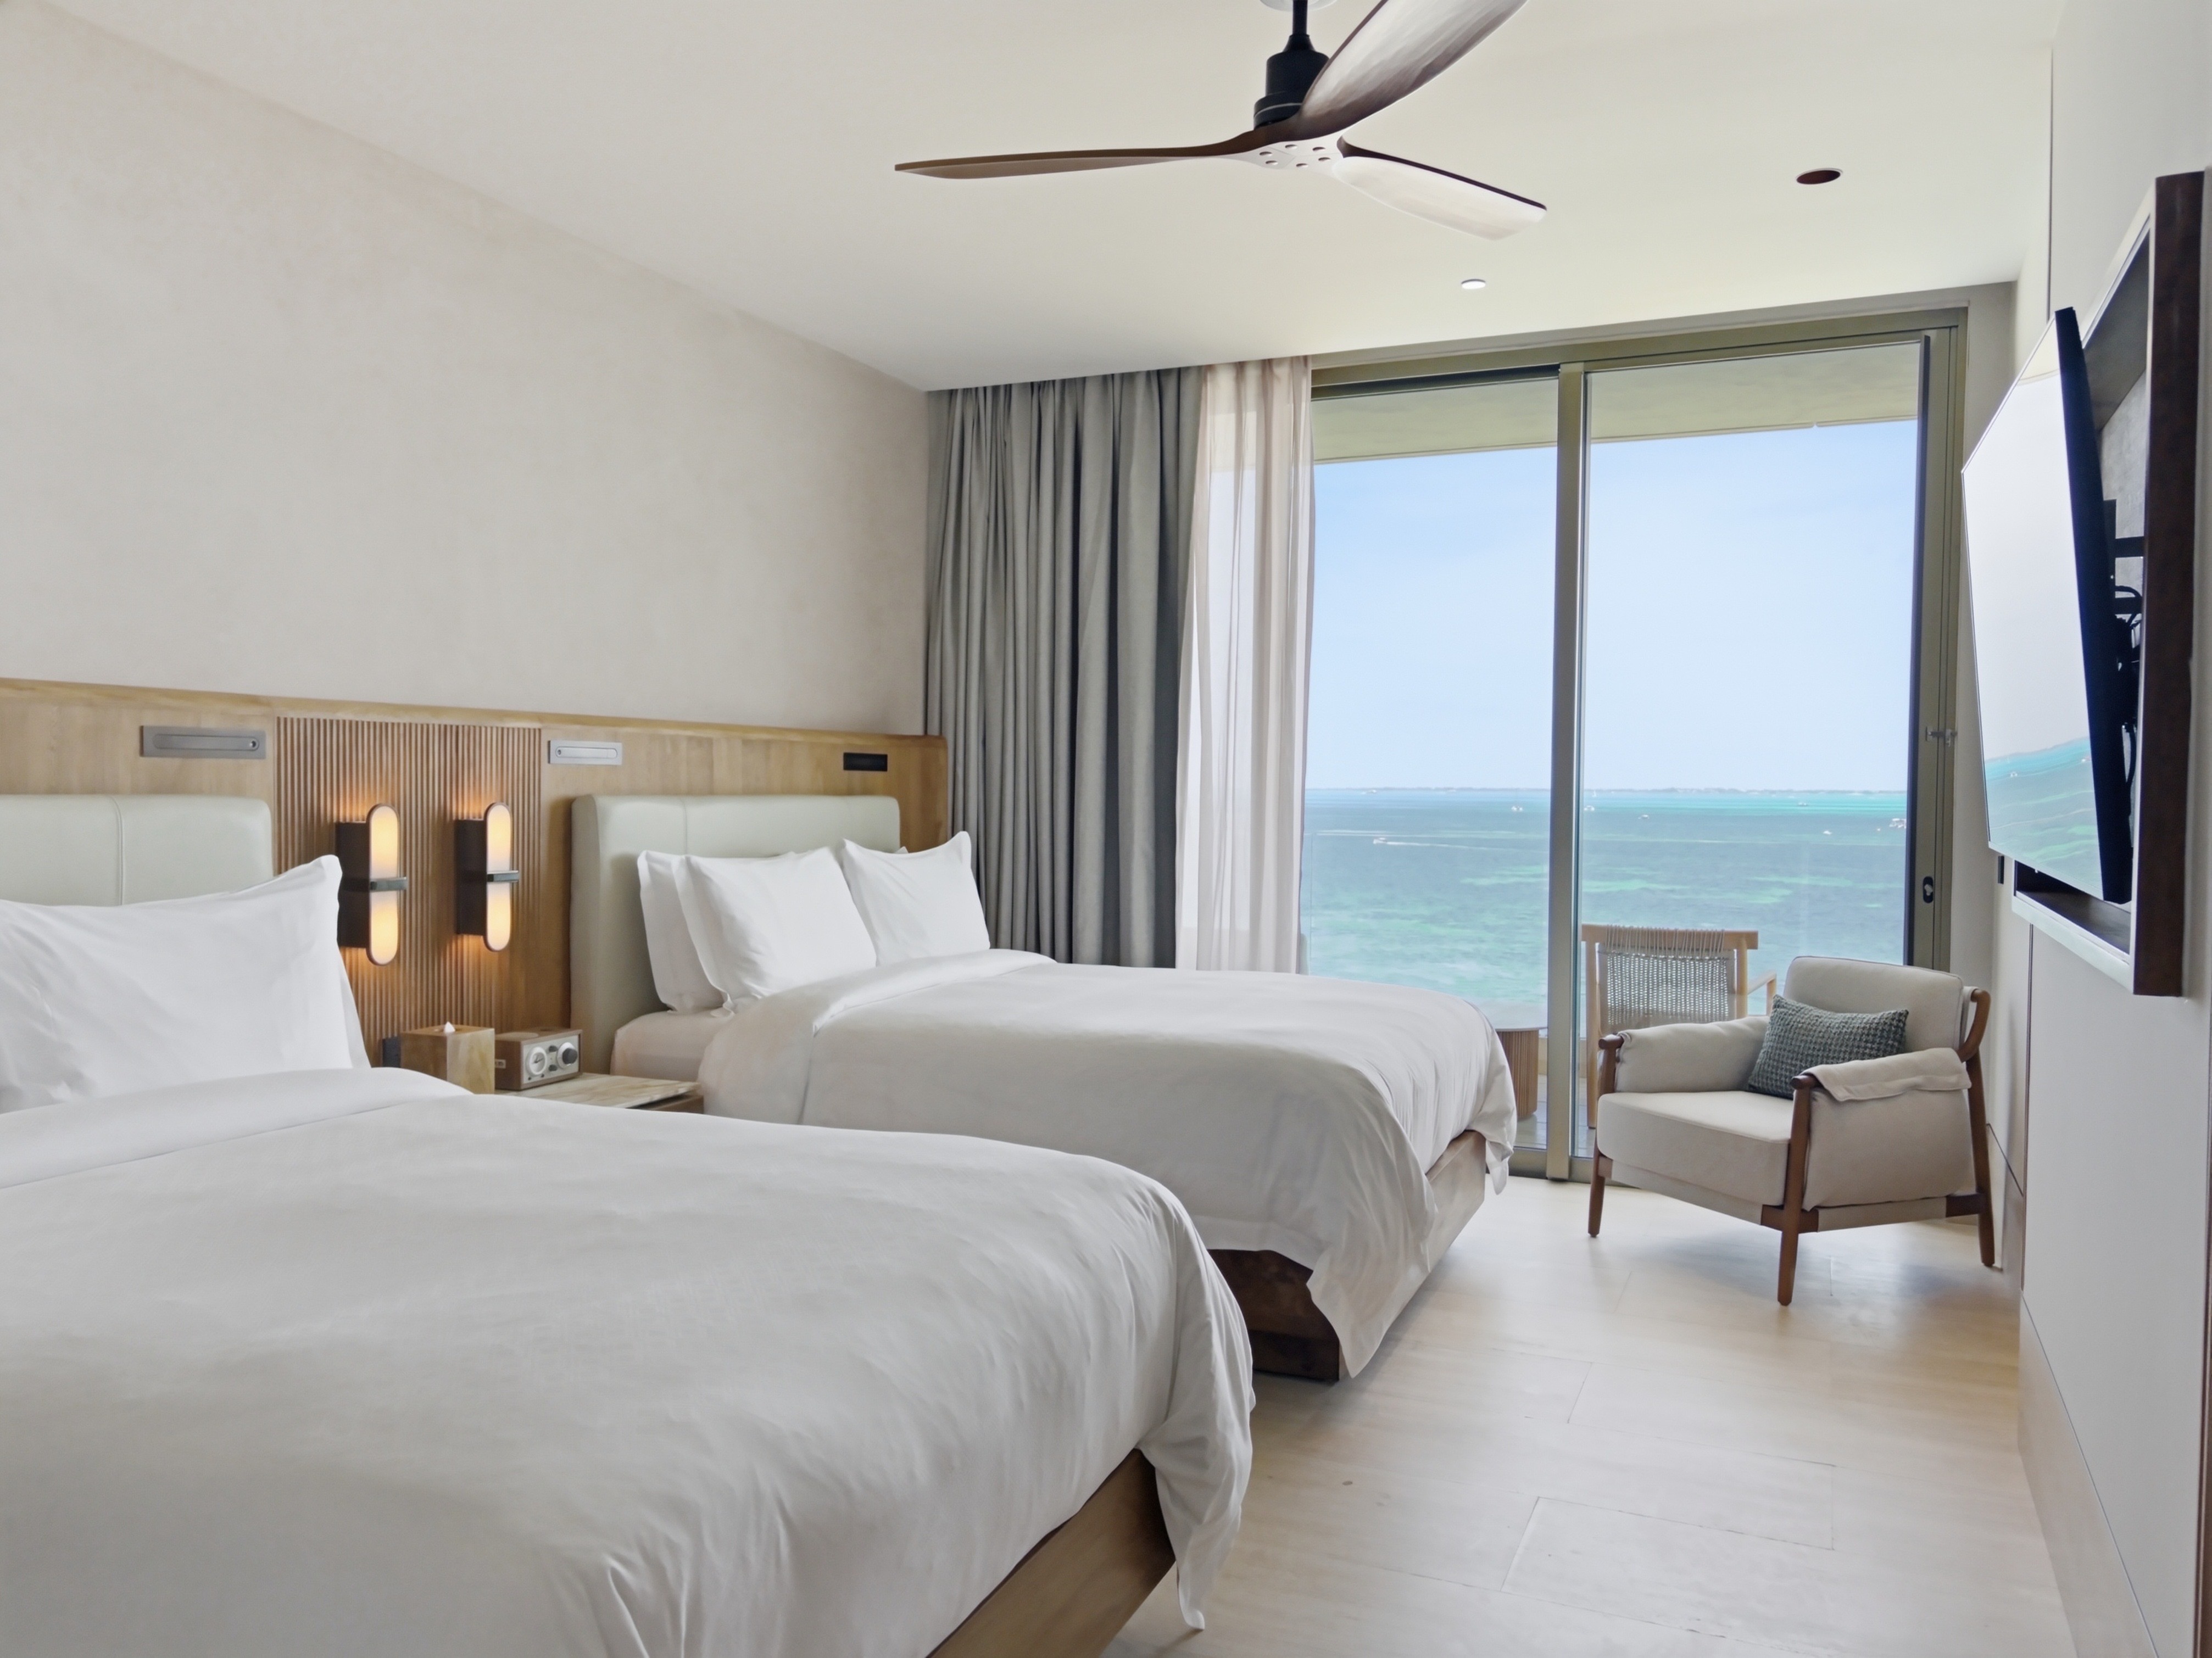
angle from below chest height — the space looks compressed
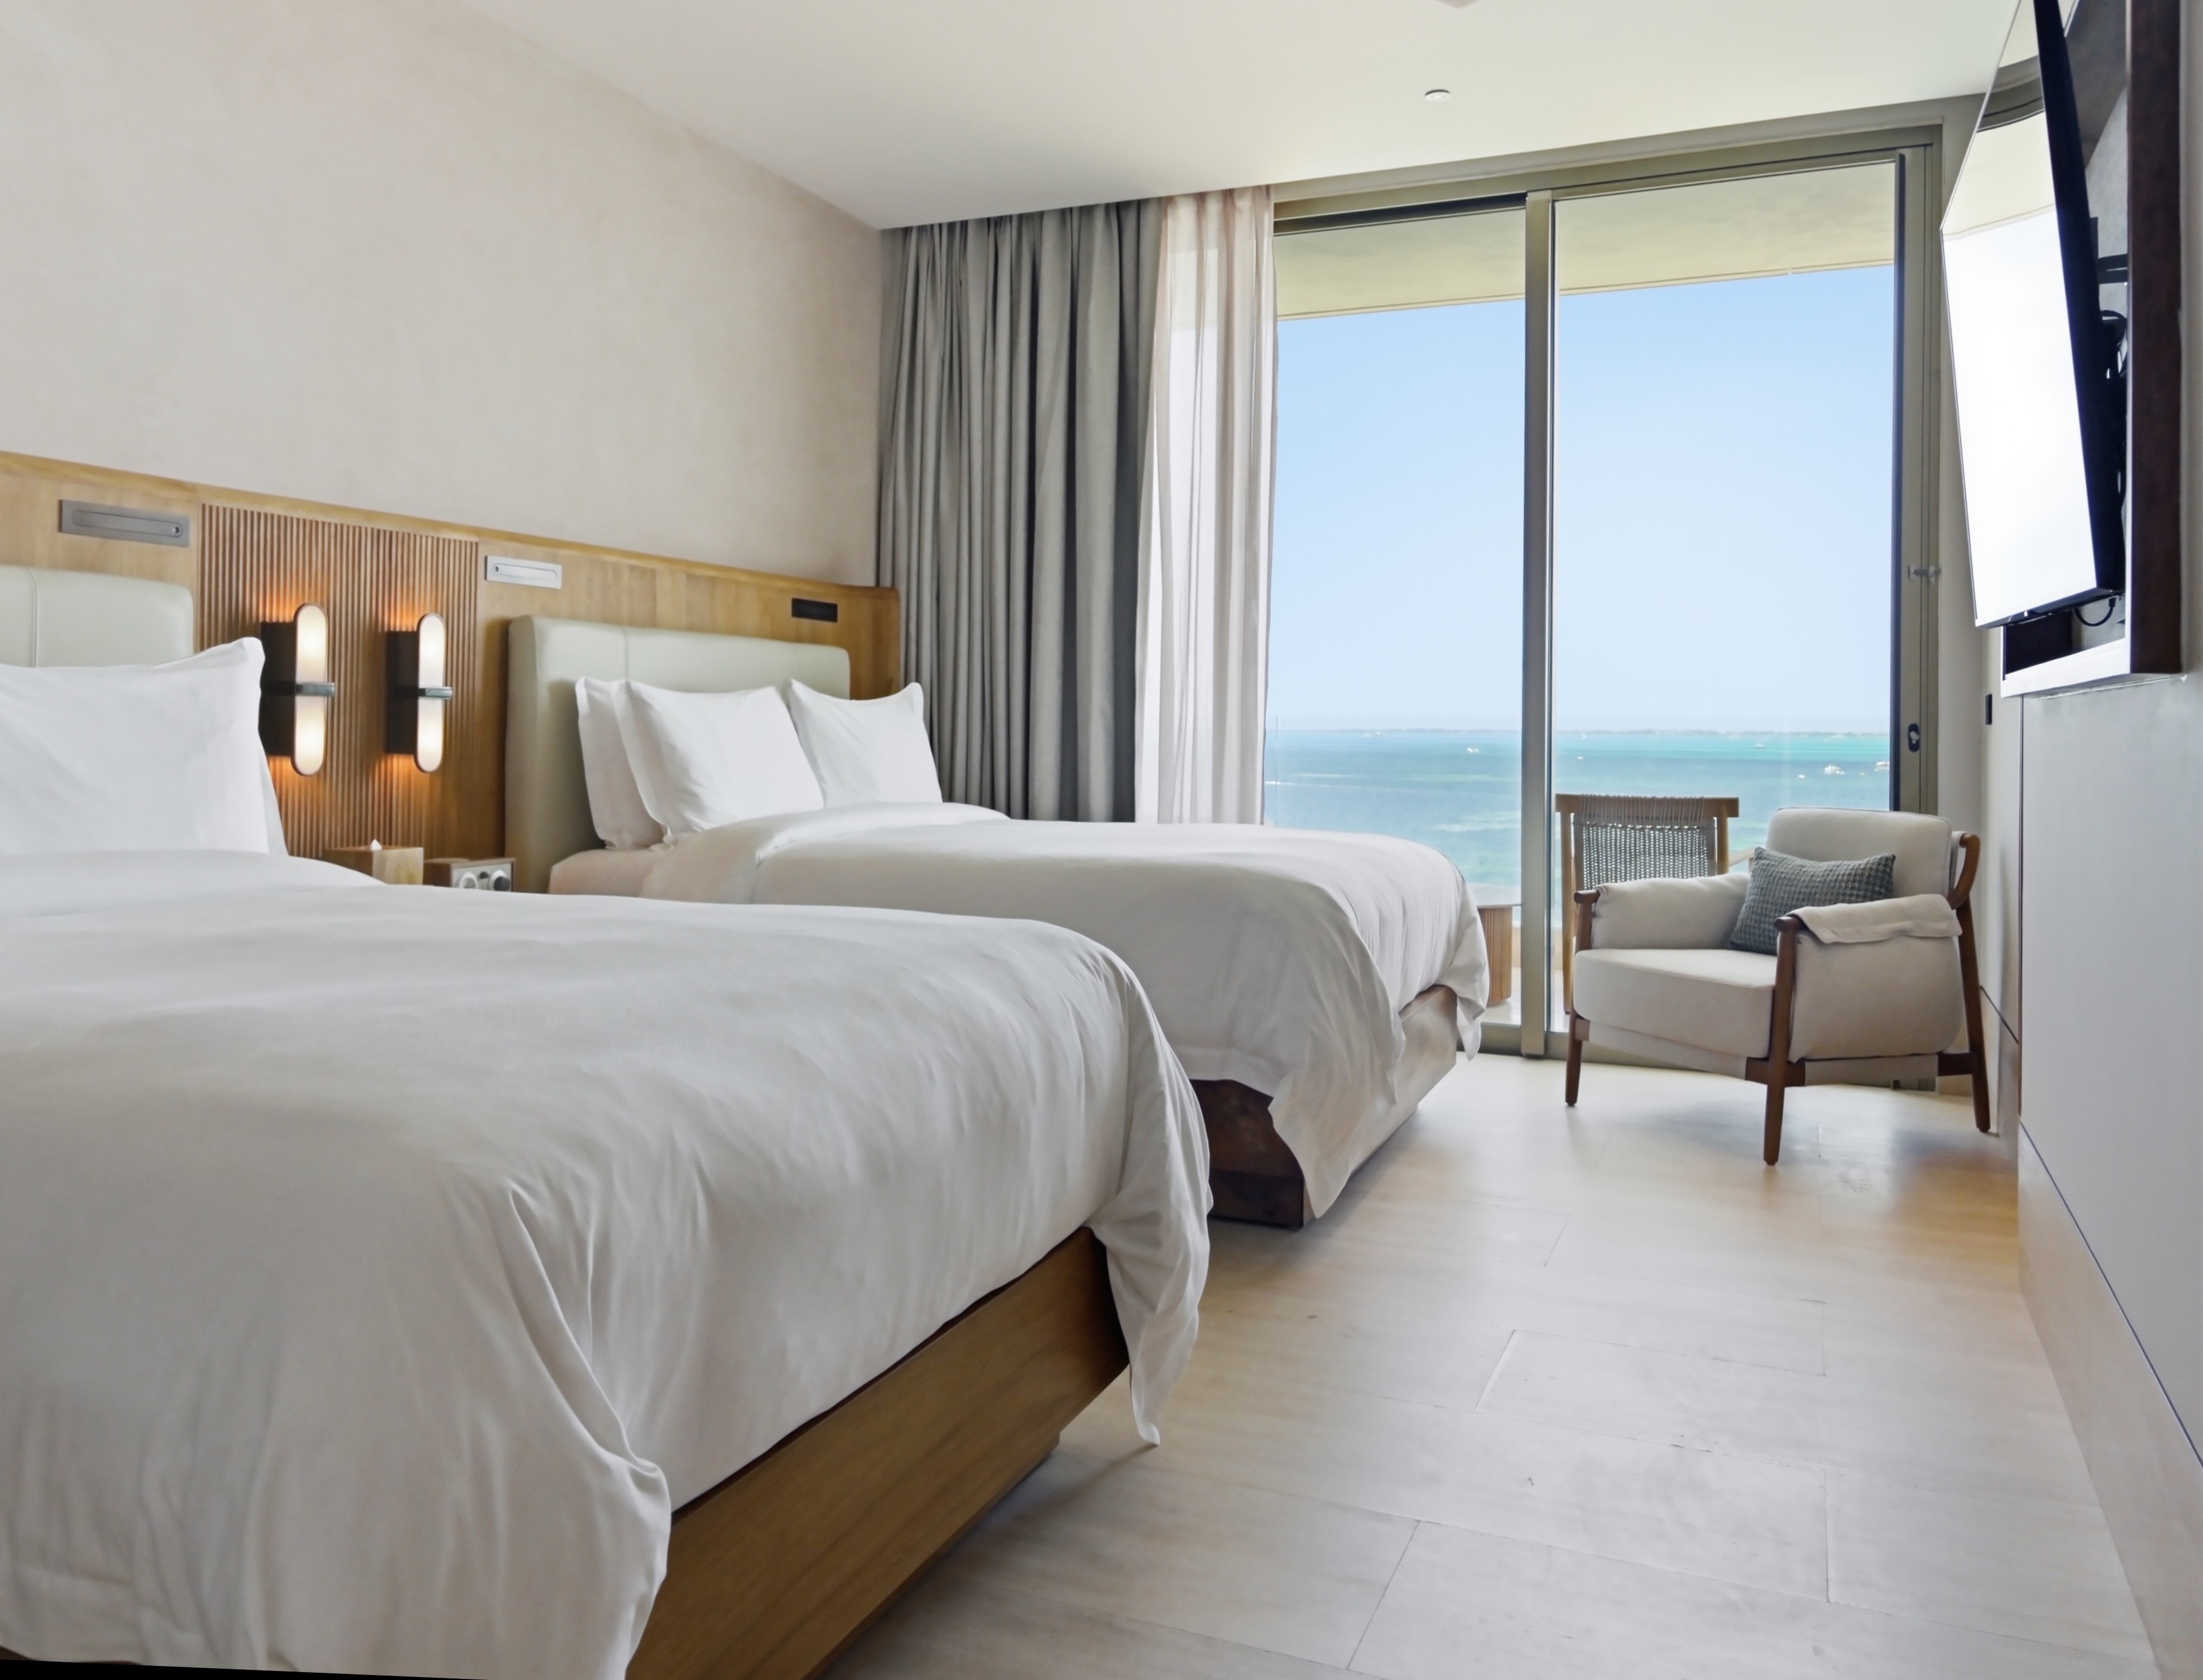 Exceptions obviously exist — if you specifically want to emphasize ceiling height or how spacious a room feels, it can sometimes make sense to shoot from a lower angle. But as a general rule for the vast majority of shots, we recommend sticking to chest height, and ideally comparing it yourself on your own property — the difference is obvious at first glance.
A clean lens — the smallest step we underestimate the most
This sounds almost too simple to deserve its own section, but it's one of the most common mistakes we come across: a dirty phone lens.
A phone spends most of the day in a pocket or a bag, and fingerprints, dust, or a thin layer of grease on the lens are almost impossible to spot on the screen with the naked eye. In the photo, though, they show up as a haze, a smudge, or a loss of sharpness — and someone just glancing at the preview on the screen often won't notice until they zoom in on the photo or upload it to the listing.
The fix is trivial: before every shoot, wipe the phone's lens (not the screen — the camera lens on the back) with a clean piece of cloth — your own shirt or sleeve works fine. Archir automatically reminds users to do this before every shoot, but it's a habit worth having no matter which app or phone you're shooting with.
Staging, shooting height, and a clean lens aren't advanced photography technique — they're three small things that take a few minutes to sort out, and yet most people photographing a property on their own never think about them at all. That small extra bit of care is usually exactly what makes the difference between a photo that looks like it was taken on a phone and one that looks professional.
Enjoy this kind of article? Follow us on Instagram or sign up for our newsletter — next time we'll look at how many photos a listing actually needs, and how to tell if a room has bad lighting.